AWS China, Big Data and IoT (PART 3)
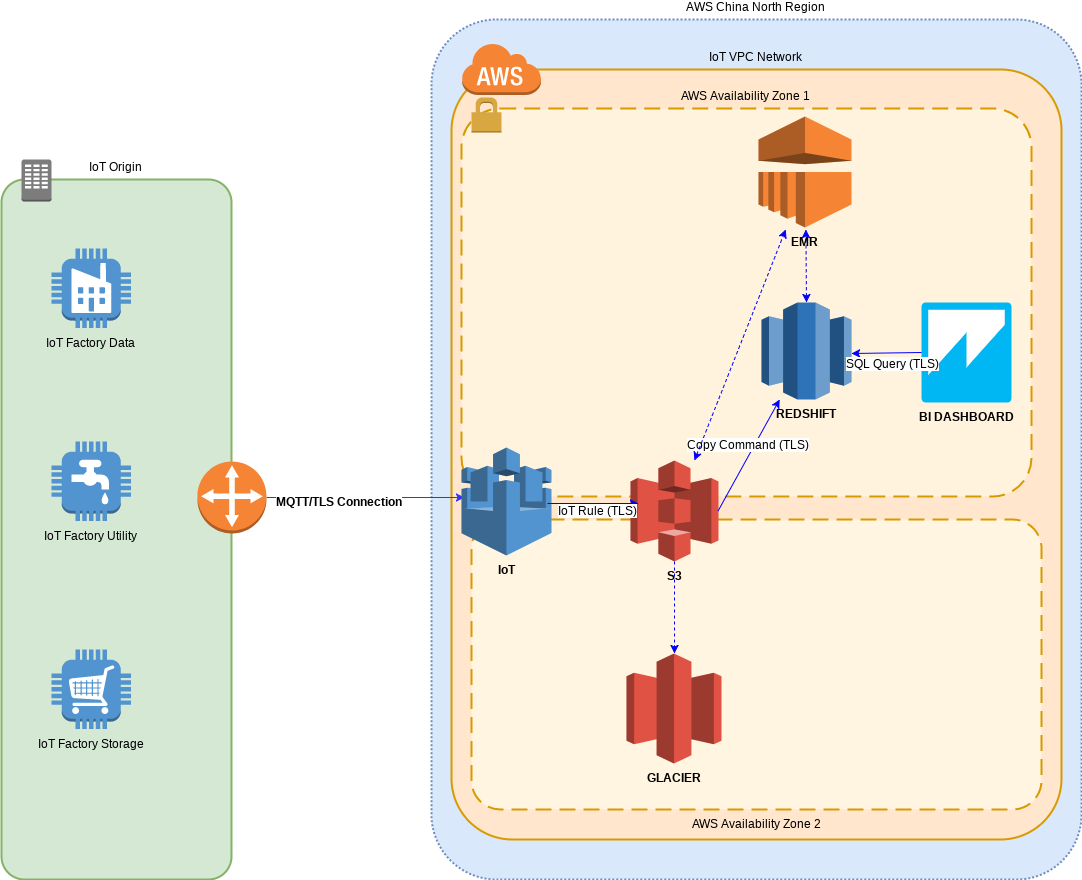
For the third part of this series of articles, we will create a small Redshift instance, and we will learn how to synchronize data between S3 and Redshift.
The first step will be to use AWS Identity and Access Management IaM to create a role for Redshift to access S3.
On the second step we will create a sample Redshift cluster, and finally, we will use a special SQL COPY command to ingest the JSON data from S3 into Redshift.
Create an IaM Role
For any operation that accesses data on another AWS resource, such as using a COPY command to load data from Amazon S3, your cluster needs permission to access the resource and the data on the resource on your behalf. You provide those permissions by using AWS Identity and Access Management, either through an IAM role that is attached to your cluster or by providing the AWS access key for an IAM user that has the necessary permissions.
To best protect your sensitive data and safeguard your AWS access credentials, we recommend creating an IAM role and attaching it to your cluster.
To create an IAM Role for Amazon Redshift
-
Sign in to the AWS Management Console and open the IAM console at https://console.aws.amazon.com/iam/.
-
In the left navigation pane, choose Roles.

-
Choose Create New Role
-
In the AWS Service Roles, choose Amazon Redshift and choose Select.
-
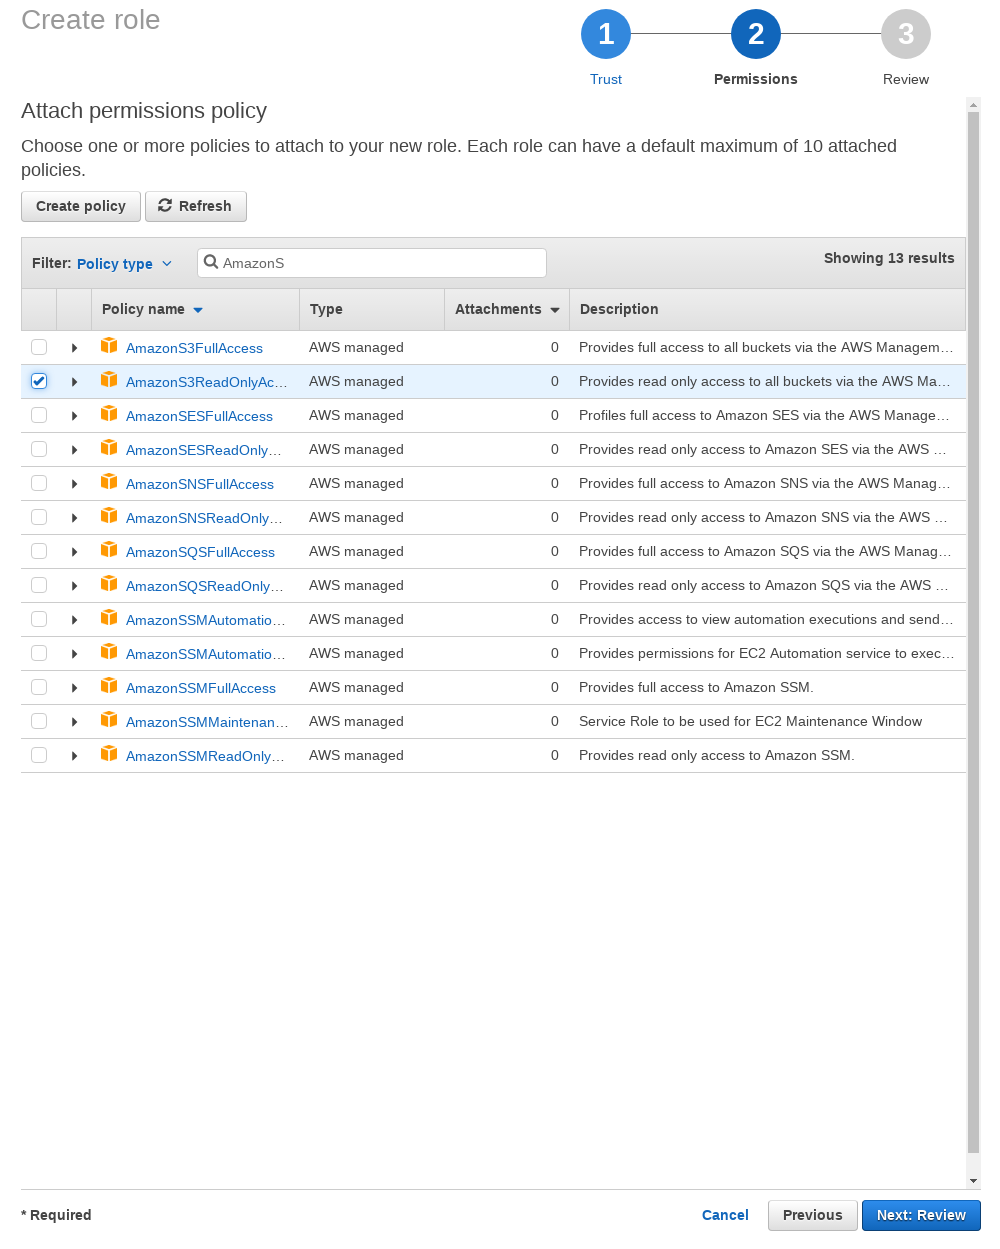
On the Attach Policy page, choose AmazonS3ReadOnlyAccess, and then choose Next Step.
-
For Role Name, type a name for your role. For this tutorial, type myRedshiftS3Role.
-
Review the information, and then choose Create Role.
-
Choose the role name for new role.
-
Copy the Role ARN to your clipboard—this value is the Amazon Resource Name (ARN) for the role that you just created. You will use that value when you use the SQL COPY command to load data later in this article.

Launch an Amazon Redshift Cluster
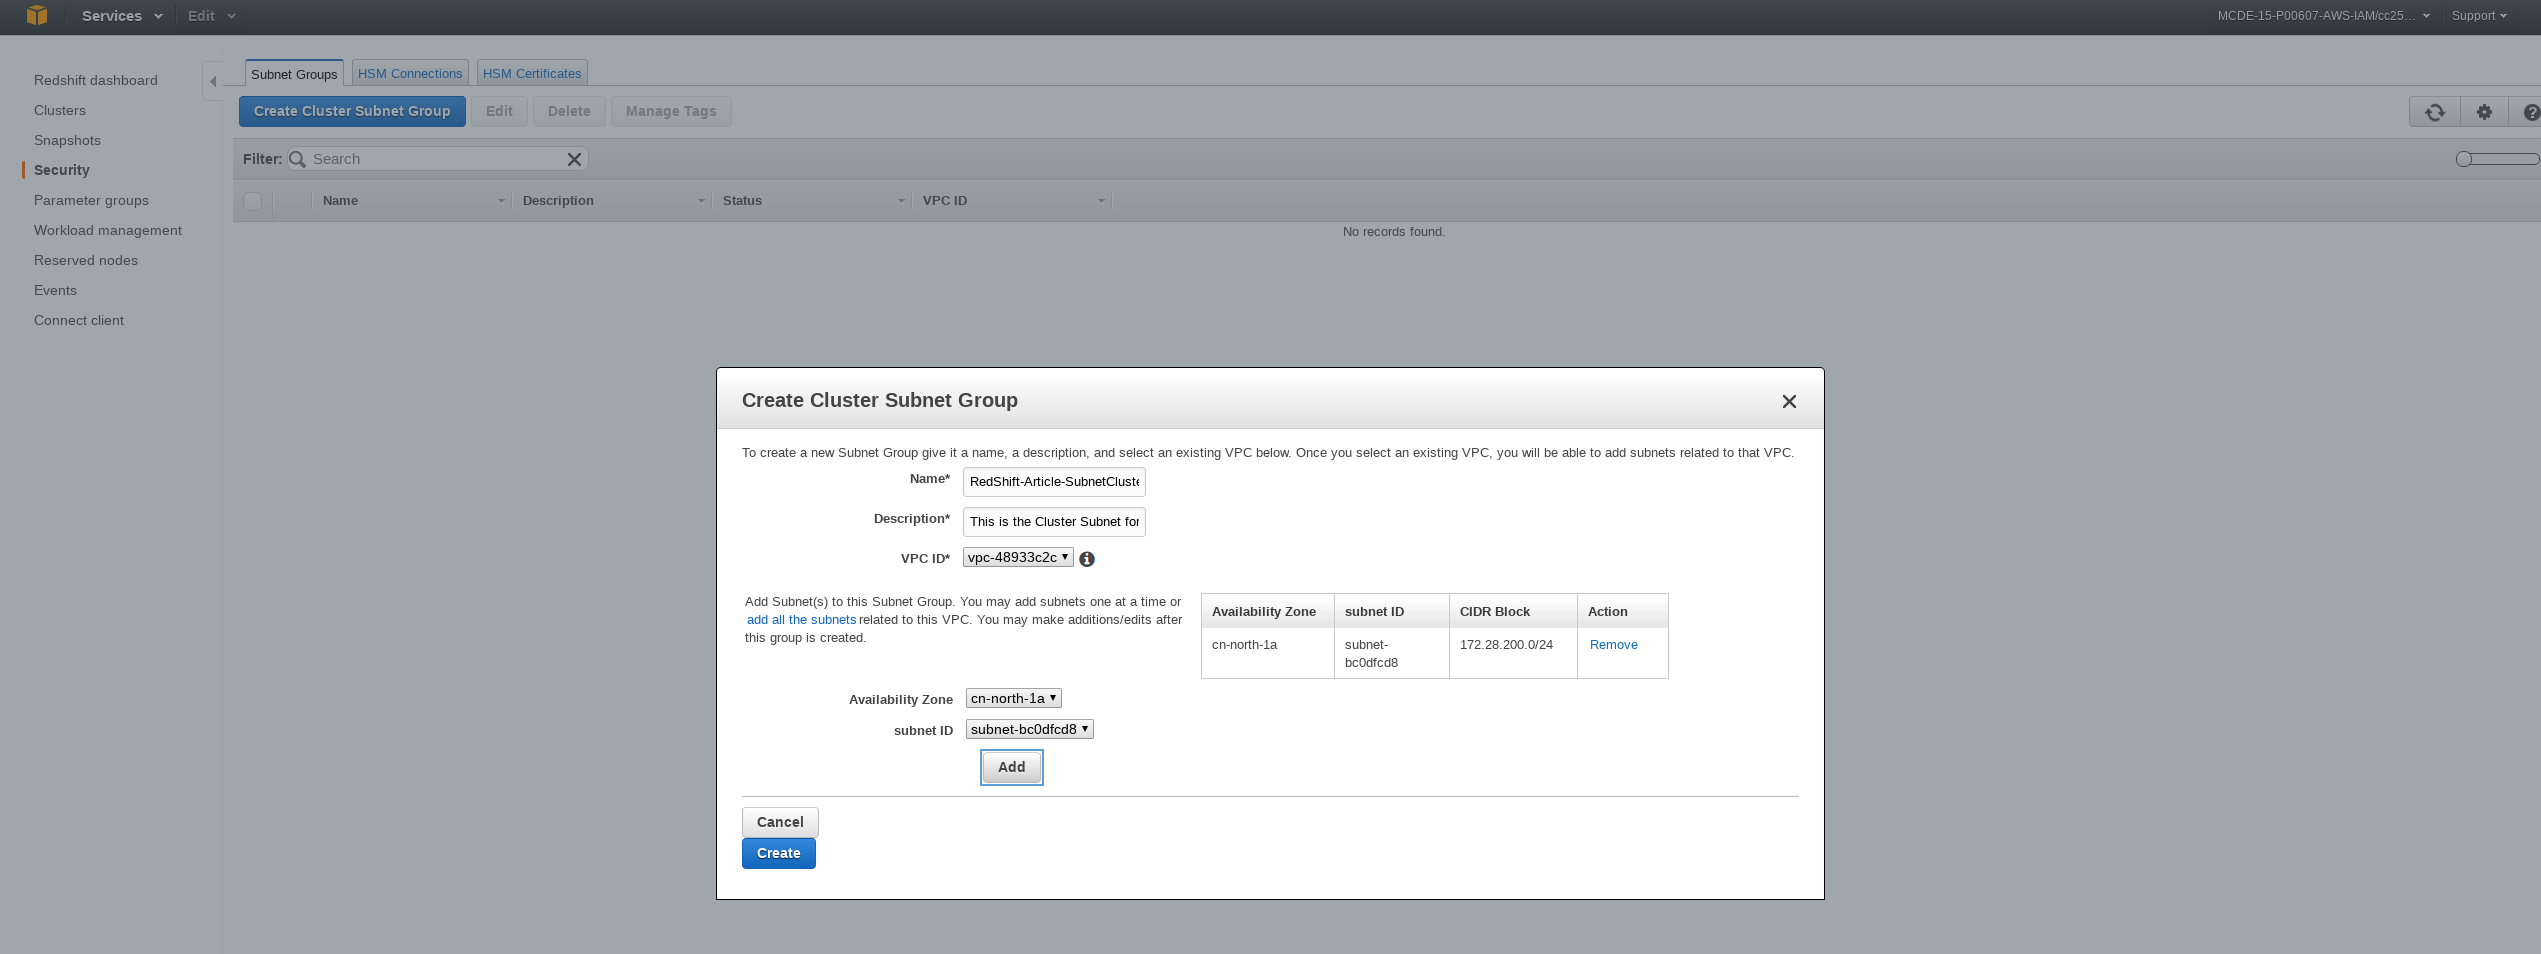
- Sign in to the AWS Management Console and open the Amazon Redshift console at https://console.aws.amazon.com/redshift/. <NOTE: Step 2 is only necessary in case you want to create the RedShift Cluster on a non-standard VPC. If you folowed this article and you only have the Standard VPC then please go directly to Step 3>
- On the Amazon Redshift Dashboard, choose Security -> Subnet Groups ->Create a Cluster Subnet Group. There choose your non-standard VPC, create a description and choose Availability Zone and Subnet.
- On the Amazon Redshift Dashboard, choose Launch Cluster.
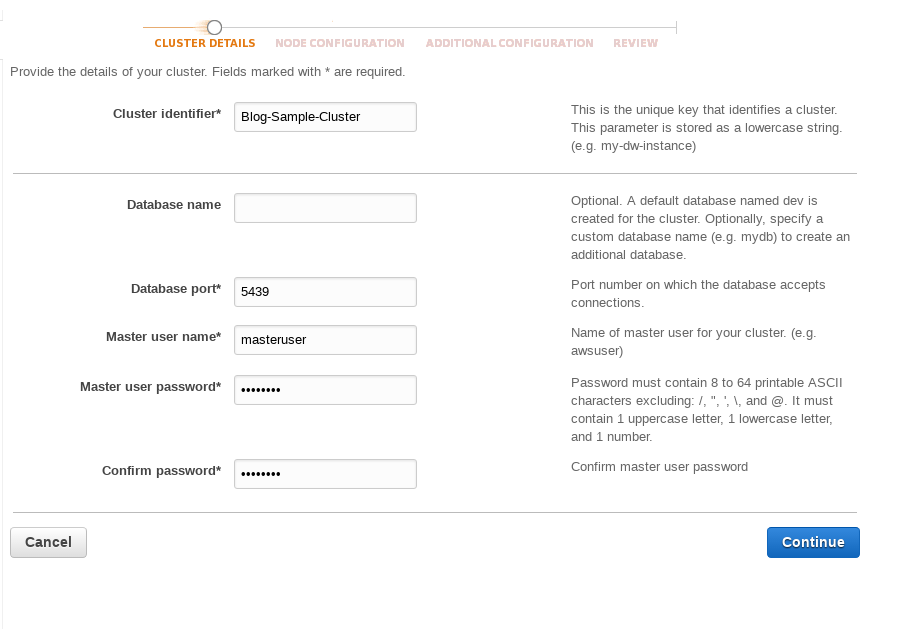
- On the Cluster Details page, enter the following values and then choose Continue:
Cluster Identifier: Name your cluster
Database Name: leave this box blank. Amazon Redshift will create a default database named dev.
Master User Name: type masteruser. You will use this username and password to connect to your database after the cluster is available.
Master User Password and Confirm Password: type a password for the master user account.
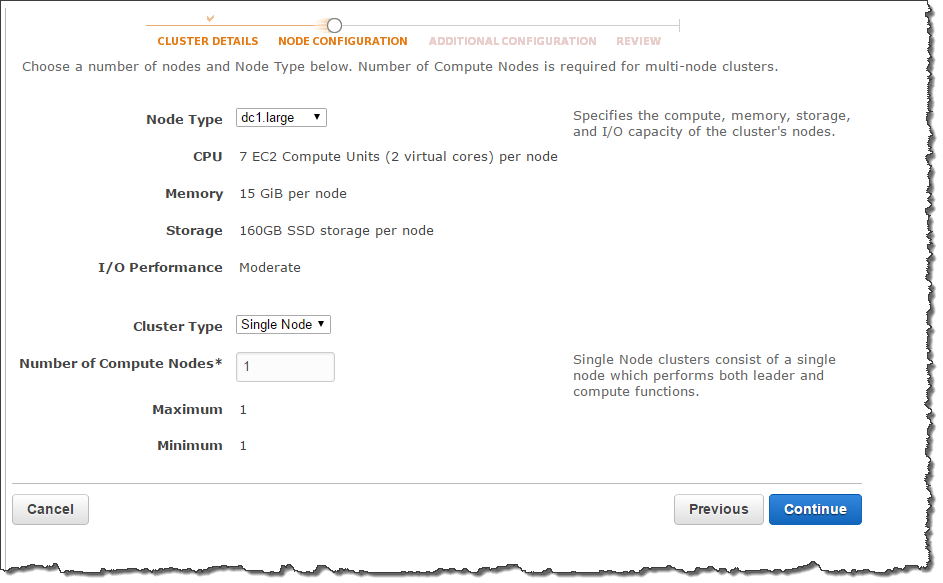
- On the Node Configuration page, select the following values and then choose Continue:
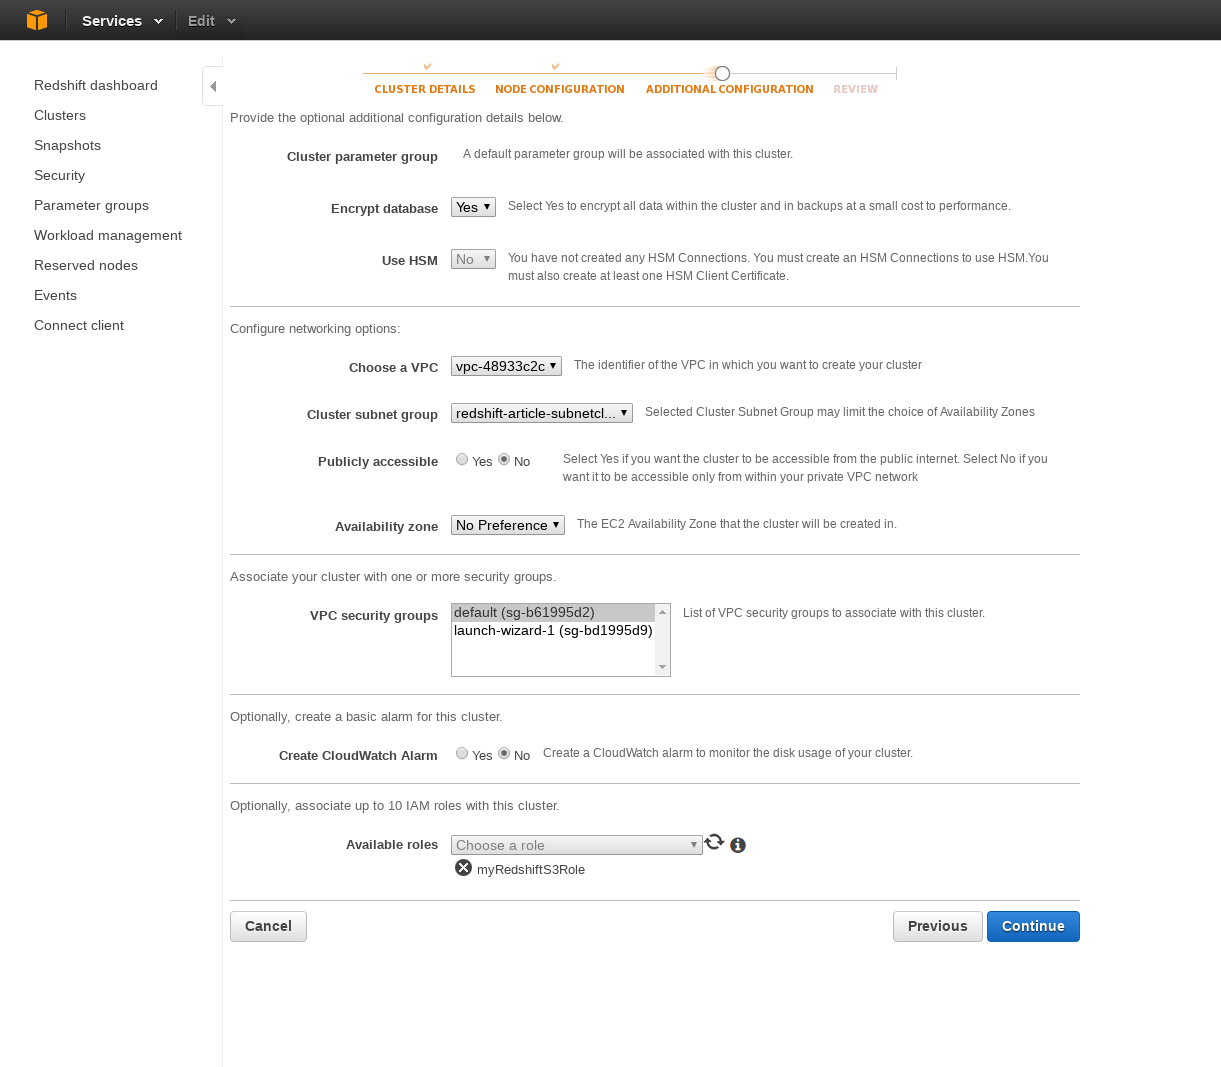
- For the Section Additional Configuration. Choose Encrypt Database : Yes, The VPC you want to use and also the role we created on Section 1.
Your cluster will be created in a few minutes…
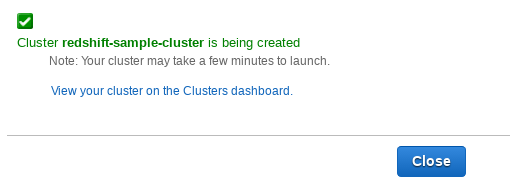
After all parameters become green on the Cluster Console, the RedShift is ready to roll. It might happen that the DB Health parameter takes a longer time to become green.
